
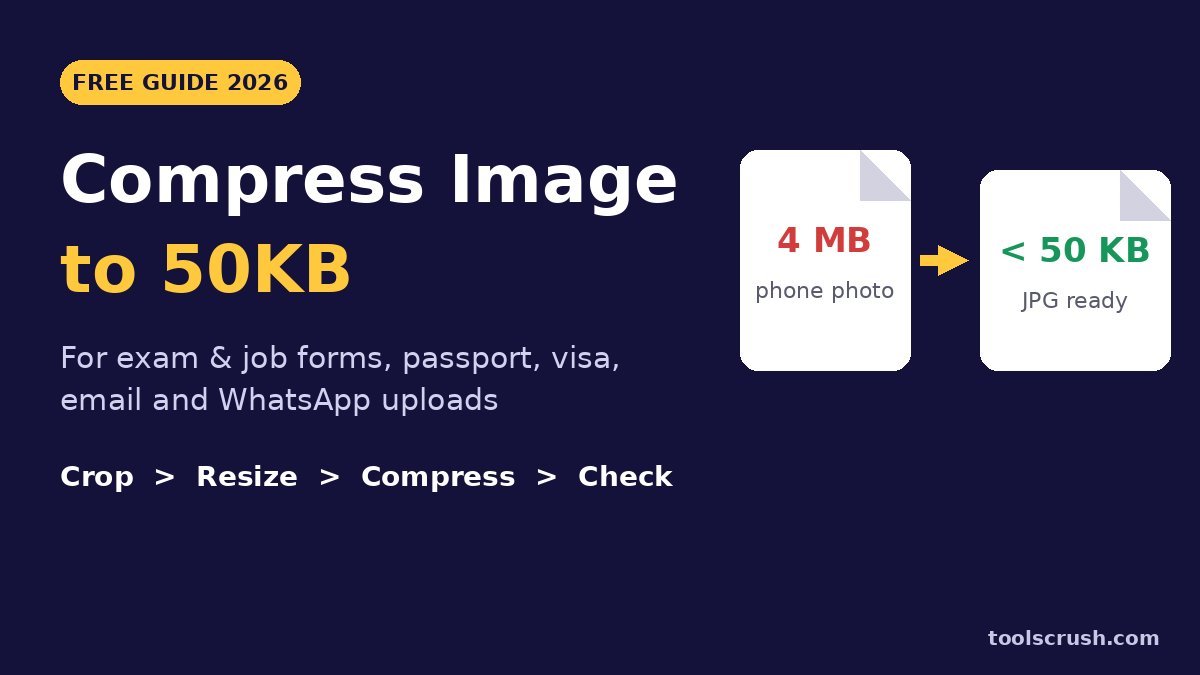
To compress image to 50KB, crop away extra background, resize the photo to about 600–1,000 pixels wide, save it as JPG, and lower the quality slider until the size reads 45–48 KB. With the free ToolsCrush Image Compressor and Image Resizer, this takes about two minutes on a phone or laptop, and your face or document stays sharp.
Most of us meet the 50KB rule at the worst moment: the form is half filled, the last date is close, and the upload box keeps saying “file size too large”. Phone cameras today make photos of 3–5 MB or more, which is close to a hundred times bigger than what many portals accept. The good news is that you do not need Photoshop or any paid app to compress image to 50KB.
This guide explains why these limits exist, how to compress image to 50KB step by step, how to keep the picture clear, and what to do when the file is still a little too big.
Key takeaways
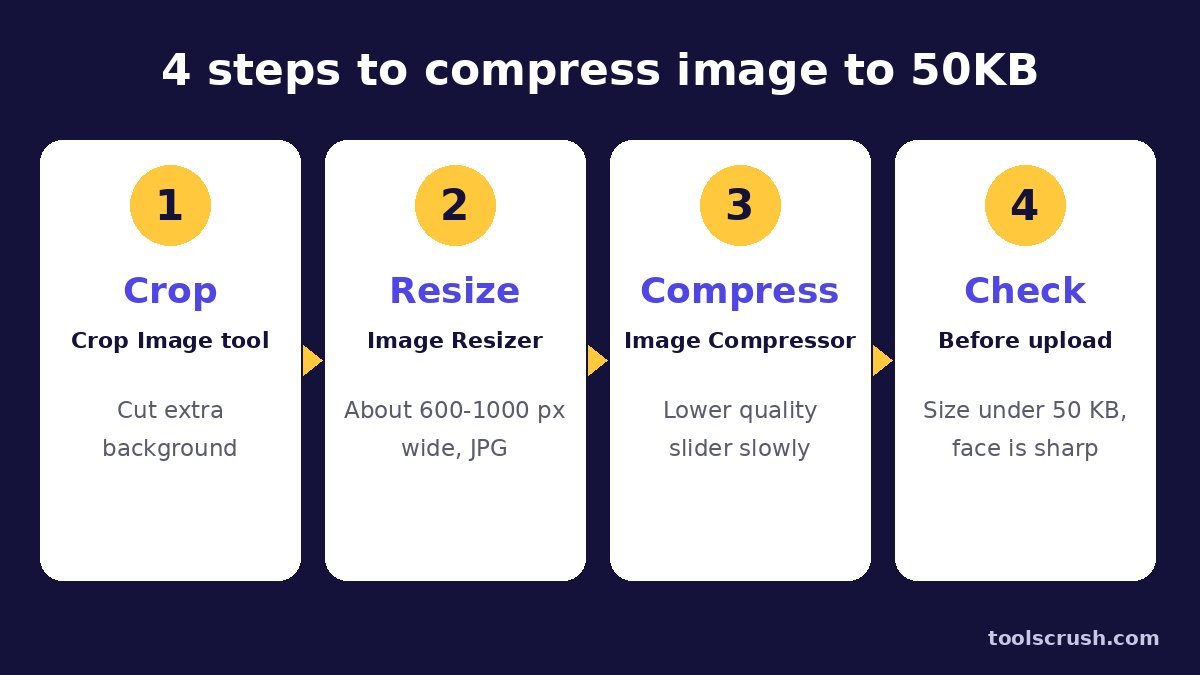
- To compress image to 50KB, order matters: crop first, resize second, compress last.
- When you compress image to 50KB, pixel size (width × height) affects file size the most. Quality is the fine-tuning knob.
- Use JPG for photos. PNG photos are usually many times bigger.
- Aim for 45–48 KB, not exactly 50 KB, so the portal accepts it whichever way it counts KB.
- Always read the official notice. Some portals also set a minimum size, so a very tiny file can be rejected too.
- ToolsCrush image tools work inside your browser, so your photo is not uploaded to a server.
Why do forms ask for a photo under 50KB?
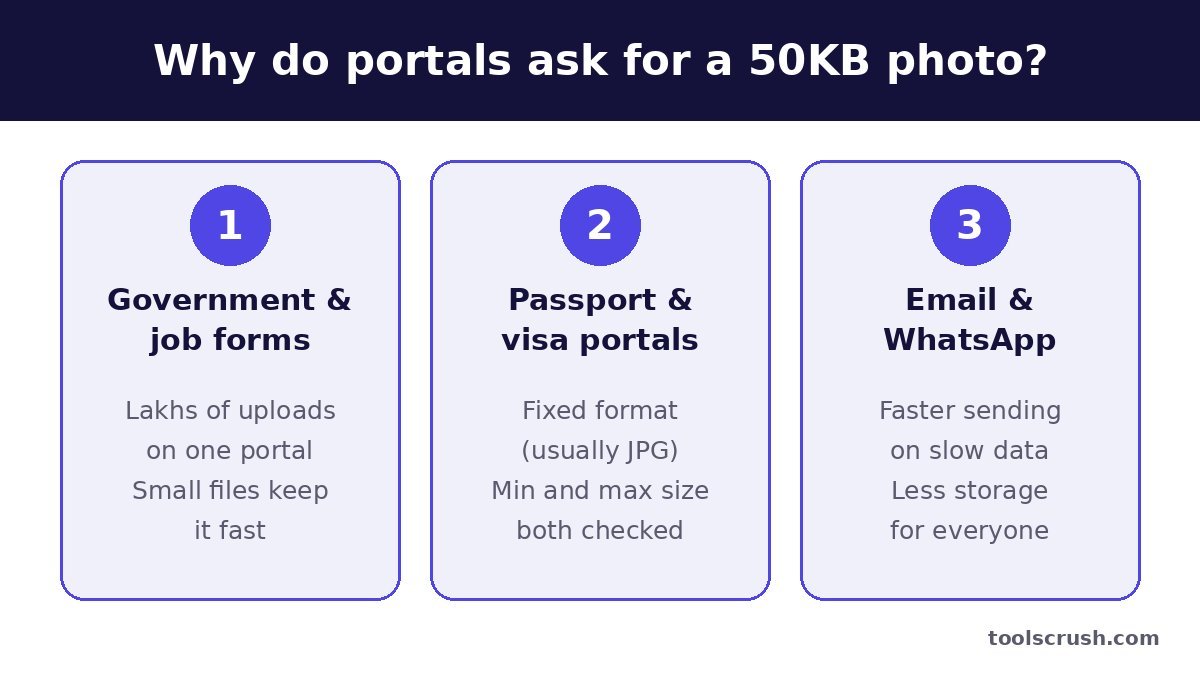
A 50KB limit is not there to trouble you. It is there because one portal receives a huge number of uploads, and small files keep the whole system fast. Here are the three places you will meet it most.
Government and job application forms
Recruitment exams, university admissions, scholarship portals and state job forms collect a photo, a signature and sometimes a thumb impression from every candidate. When lakhs of people apply in the same week, every extra kilobyte means more storage and slower pages. So these portals set a fixed range, often somewhere between 10 KB and 100 KB, and reject anything outside it. Knowing how to compress image to 50KB quickly saves a lot of stress near the last date.
The exact range changes from form to form and even from year to year. That is why you should always check the latest notification. If your form asks for 20 KB or less, follow our resize photo and signature to 20KB guide instead, because the settings for a 20 KB file are different.
Passport and visa portals
Passport and visa sites check the format, the shape and the size of your photo. For example, the official Indian e-Visa portal asks for a JPEG photo between 10 KB and 1 MB, with equal height and width. Other portals, such as Passport Seva for Indian passports, have their own instructions, so read the guidelines on the official site before you upload.
Even when a visa portal allows a larger file, many people still compress image to 50KB so that the upload goes through quickly on mobile data and does not time out halfway.
Email and WhatsApp uploads
HR teams, colleges, landlords and banks often ask you to “just send a photo on WhatsApp or email”. A 4 MB photo is slow to send on a weak network and fills up the other person’s phone. A clear photo 50KB in size opens instantly and is enough for ID cards, office records and most quick checks. Learn to compress image to 50KB once and you can handle every such request in seconds.
What does 50KB actually mean?
KB stands for kilobyte. Most phones and Windows computers count 1 KB as 1,024 bytes, so 50 KB is 51,200 bytes. Some websites count 1 KB as 1,000 bytes, so for them 50 KB is 50,000 bytes. This small difference is the reason a file that shows “50 KB” on your phone can still be rejected.
The simple fix is to keep a small safety margin. When you compress image to 50KB, stop when the size reads around 45–48 KB. That passes on every portal, whichever way it counts.
Also remember that 1 MB is about 1,000 KB. A 4 MB phone photo is therefore around 80 times bigger than the target, which is why the default compression setting alone rarely manages to compress image to 50KB. You also need to reduce the pixel size.
Common photo size targets: 20KB, 50KB, 100KB and 200KB
This guide shows how to compress image to 50KB, but different forms ask for different sizes. The table below gives a general idea of where each target usually appears and roughly what pixel width to start with for a normal photo. Treat it as a starting point, not a rule, and always follow the official notice for your form.
| Target size | Where it is commonly asked | Good starting width (JPG) |
|---|---|---|
| 20 KB | Signatures and small passport-size photos in many exam forms | About 300–400 px |
| 50 KB | Passport-size photos in job, admission and scholarship forms; quick WhatsApp or email sharing | About 600–1,000 px |
| 100 KB | Clear photos for profiles and some ID uploads; scanned certificates as images | About 1,000–1,400 px |
| 200 KB | Document scans, ID card images and photos where detail matters | About 1,400–1,800 px |
If your form wants a PDF instead of an image, the method is different. See our compress PDF to 100KB, 200KB or 500KB guide for PDF targets.
How to compress image to 50KB with ToolsCrush (step by step)
You need only three free tools to compress image to 50KB: the Crop Image tool, the Image Resizer and the Image Compressor. All three run in your browser, so they work on Android, iPhone, Windows and Mac without installing anything.
Step 1: Crop the photo (optional but helpful)
Open the Crop Image tool and select your photo. Choose Freeform if your form needs a passport shape, or 1:1 Square if it asks for equal height and width. Drag the box so your face and shoulders fill most of the frame, then pick JPG Image (.jpg) as the save format and tap Crop & Download.
Cropping removes walls, doors and furniture that add kilobytes but add nothing useful. Skip this step if the photo is already framed correctly.
Step 2: Resize to a sensible width
Open the Image Resizer and select the cropped photo. Choose By Pixels and type a width of 800 px to begin with; the aspect ratio lock fills in the height so the face does not stretch. If your form gives exact pixel dimensions, type those instead. Set Export Format to JPG and tap Resize & Download.
The tool shows an estimated size before you download. If it is already under 48 KB, you have managed to compress image to 50KB in just two steps. If not, go to Step 3.
Step 3: Compress image to 50KB with the quality slider
Open the Image Compressor and select the resized file; this is where you finally compress image to 50KB. The quality slider starts at 80%. Move it down in small steps, about 5% at a time, and watch the Compressed Size line. Stop when it shows 45–48 KB. The Resize Width Dimension slider can shrink the image further if the quality has to go very low.
Then tap Download Compressed Image. This is the easiest way to compress jpg to 50kb without guessing.
Step 4: Check the file before you upload
On Android, open the file in your gallery and tap Details or the (i) icon. On iPhone, open it in the Files app and long-press for Get Info. On Windows, right-click the file and choose Properties. Confirm three things: the size is under 50 KB, the format is JPG or JPEG, and the face or text is still clear when you zoom in. This quick check is the last part of every attempt to compress image to 50KB.
How to compress jpg to 50kb on a mobile phone
Most people fill forms on their phone, and the same steps to compress image to 50KB work in Chrome or Safari. A few phone-specific tips save time:
- Take the photo in good daylight against a plain light wall. Noise from a dark room makes the file bigger.
- On iPhone, photos may be saved as HEIC. Before you photograph, set Camera, then Formats, to Most Compatible so new photos save as JPG. Apple’s guide to HEIF and HEVC explains this setting.
- Do not share the photo to yourself on WhatsApp first and then download it. Each round of compression lowers the quality.
- Download each step’s result to the same folder, so you do not upload the original 4 MB file by mistake.
- Rename the final file, for example “photo-48kb.jpg”, so it is easy to find in the upload box.
Once you have done it a couple of times, it takes less than a minute to compress image to 50KB right from your phone.
Our test: how width and quality change the file size
To show what it really takes to compress image to 50KB, we took one 4000 × 3000 pixel photo from a mobile phone, resized it to different widths and saved each one as JPG at different quality levels. Here is what we got.
| Width × height | Quality 80 | Quality 70 | Quality 60 | PNG (lossless) |
|---|---|---|---|---|
| 1600 × 1200 | 147 KB | 104 KB | 81 KB | 2,403 KB |
| 1200 × 900 | 84 KB | 62 KB | 50 KB | 1,377 KB |
| 1000 × 750 | 60 KB | 46 KB | 38 KB | 966 KB |
| 800 × 600 | 42 KB | 32 KB | 27 KB | 627 KB |
| 600 × 450 | 27 KB | 21 KB | 18 KB | 360 KB |
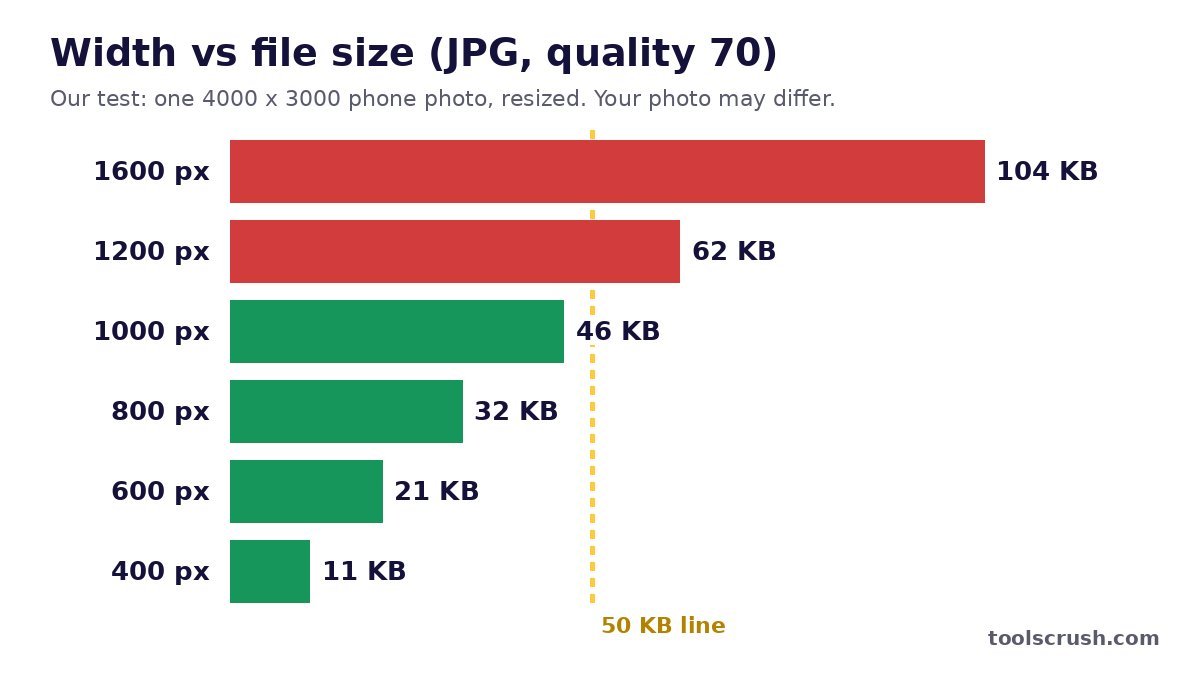
Three lessons stand out. First, width matters most when you compress image to 50KB: going from 1,600 px to 800 px cut the size by about two-thirds at the same quality. Second, at 800 px wide, even quality 80 was comfortably under 50 KB, so you do not have to crush the quality. Third, PNG was hundreds of kilobytes at every size, so PNG is the wrong choice for a photo 50KB target.
Your own photo will give somewhat different numbers, because a busy background or a dark, noisy shot needs more kilobytes than a plain one. But the pattern stays the same.
Tips to reduce image size to 50KB without blurring
A blurry photo is a common reason for rejection, even when the size is right. These tips help you reduce image size to 50KB and still keep a clean, sharp result.
Get the dimensions right first
The fastest way to compress image to 50KB is to bring the width down first, to 600–1,000 px. A passport-size photo printed at 3.5 cm × 4.5 cm needs far fewer pixels than your camera captures, so you lose no visible detail. If the form lists exact pixel dimensions, use them, because the portal may reject other sizes.
Keep JPG quality between 60 and 85
Once the width is sensible, quality between 60 and 85 is usually enough to compress image to 50KB. Below about 50, you start to see blocky patches around the hair, ears and text. If you have to drop that low, reduce the width a little instead.
Choose the right format
JPG (also written JPEG) is designed for photos and is accepted almost everywhere; you can read about the JPEG standard on its official site. PNG is lossless and good for logos and screenshots, but it makes photos very heavy. WebP is small and modern, yet many government portals still accept only JPG, so stick to JPG when you compress image to 50KB unless the form clearly allows something else.
Start from the original photo
Always work from the original camera photo when you compress image to 50KB, not a screenshot or a forwarded copy. Every time a JPG is saved again, it loses a little detail. One clean pass of crop, resize and compress gives the sharpest result.
Worked examples for real situations
Here is how to compress image to 50KB in three everyday cases. The numbers are starting points; adjust them while watching the size on screen.
Example 1: Passport-size photo for a job form
- Start: 4 MB phone photo against a white wall.
- Crop with Freeform so the face and shoulders fill the frame.
- Resize to about 600–800 px wide in JPG.
- Compress from 80% quality, lowering slowly until the size reads about 45 KB.
- Result: a clear photo 50KB or smaller, ready to upload.
Example 2: Photo of a certificate or marksheet
- Photograph the document flat, in daylight, with no shadow of your phone.
- Crop tightly to the paper edges.
- Resize to about 1,000 px wide, so the text stays readable.
- Compress and zoom in to check that small print is still clear. If the form allows 100 KB, use it, because text needs more detail than a face.
Example 3: Sending a photo on WhatsApp or email
If someone only needs to see the photo, resize to 800 px wide and compress image to 50KB or a little less, around 40–48 KB. It sends quickly even on slow data and still looks fine on any phone screen. Ask first if they need a high-resolution copy for printing.
Can’t compress image to 50KB? Fixes when it is still too big
Sometimes the size refuses to come down, however hard you try to compress image to 50KB. Work through these fixes in order, and recheck the size after each one.
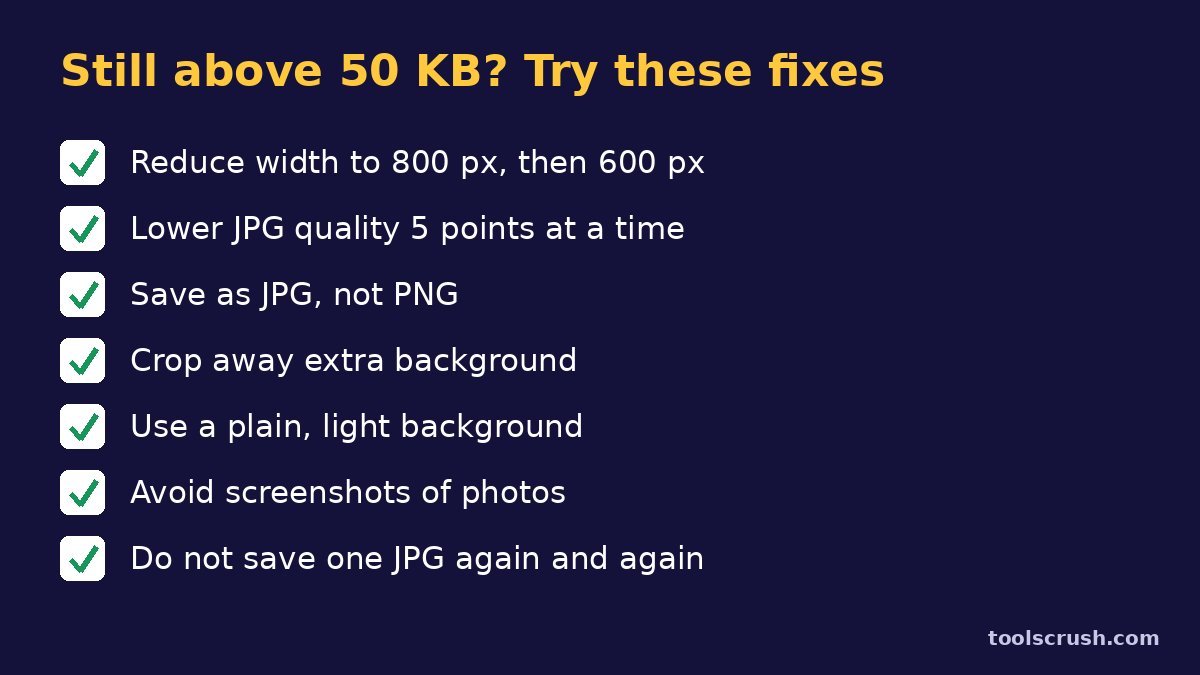
- Reduce the width again. Go from 1,000 px to 800 px, then 600 px. This is the single biggest saving.
- Lower quality in small steps. Move the slider 5 points at a time instead of jumping straight to 30%.
- Check the format. If the file is PNG, save it again as JPG from the Image Resizer or Crop Image tool.
- Crop tighter. Extra background adds kilobytes without adding anything the form needs.
- Retake on a plain background. Patterned curtains, posters and grainy low-light shots need many more kilobytes.
- Use the original photo. A screenshot or a WhatsApp-forwarded copy can carry extra noise and odd dimensions.
- Do not re-save the same JPG many times. Each save adds blocky artefacts, which can make the file bigger, not smaller.
If you have tried all of these and still cannot compress image to 50KB, check whether the portal really wants an image. Some forms ask for a PDF, which follows different rules.
What if the photo becomes too small?
Some portals set a minimum size as well as a maximum. The Indian e-Visa portal, for instance, needs at least 10 KB. If your file is below the minimum, the portal may reject it just like an oversized one. So when you compress image to 50KB, do not overdo it and end up at 5 KB.
To fix it, increase the pixel size in the Image Resizer, for example from 400 px to 700 px, or move the quality slider up. Do not simply stretch a tiny photo, because that makes it look soft. Start again from the original photo whenever you can.
Common mistakes to avoid
- Compressing first and resizing later. To compress image to 50KB cleanly, resize first, then compress.
- Aiming for exactly 50 KB. Keep a margin and stop at 45–48 KB.
- Uploading a PNG or HEIC file where the form asks for JPG or JPEG.
- Using a selfie with a cap, dark glasses or a cluttered background when the form asks for a passport-style photo.
- Mixing up photo and signature boxes. Rename files clearly before you start the form.
- Forgetting to save the final files. Keep them in one folder, because you may need them again for admit cards or document verification.
Is it safe to compress photos online?
Your photo is personal data, so this is a fair question. The ToolsCrush Image Compressor, Image Resizer and Crop Image tool process the file inside your own browser. The photo is not sent to a ToolsCrush server, and you can even switch off mobile data after the page loads. That makes it safe to compress image to 50KB even for ID photos.
As a general habit, avoid unknown apps that ask for gallery-wide access just to shrink one photo, and delete extra copies from your Downloads folder once the form is submitted.
Quick glossary
- KB (kilobyte): a unit of file size. 50 KB is about 50,000 bytes.
- Pixels (px): the tiny dots that make up an image. Width × height in pixels is the image dimension.
- Compression: making a file smaller by removing detail the eye barely notices.
- Quality slider: controls how much JPG detail is kept. Lower quality means a smaller file.
- JPG / JPEG: the same photo format, accepted by almost every portal.
- DPI: dots per inch, used mainly for printing and scanning. File size depends on pixels, not on the DPI label.
Frequently asked questions
How do I compress image to 50KB for free?
Crop the photo, resize it to about 600–1,000 pixels wide as JPG, then lower the quality slider in the ToolsCrush Image Compressor until the size reads 45–48 KB. All three tools are free and work in your browser.
How can I compress JPG to 50KB without losing quality?
Reduce the pixel width first, because that saves the most space with no visible loss. Then keep JPG quality between 60 and 85. Most photos reach a photo 50KB size this way without looking blurry.
Why is my photo still above 50KB after compressing?
The width is probably still too large. Bring it down to 800 px or 600 px, make sure the file is JPG and not PNG, and crop away extra background before compressing again.
Should I aim for exactly 50 KB?
No. When you compress image to 50KB, keep a margin. Some portals count 1 KB as 1,000 bytes and others as 1,024 bytes. Stop at 45–48 KB so the file is accepted either way.
Can I reduce image size to 50KB on my phone?
Yes. You can compress image to 50KB by opening the ToolsCrush tools in Chrome or Safari on your phone. On iPhone, set the camera format to Most Compatible so photos save as JPG instead of HEIC.
Is PNG or JPG better for a 50KB photo?
JPG is better for photos. In our test, the same photo was hundreds of kilobytes as PNG but under 50 KB as JPG at 800 px wide.
What if my form asks for a 20KB photo instead?
Use a smaller width, around 300–400 px, and follow our separate guide for 20KB photo and signature uploads, because the settings are different.
Are my photos uploaded to a server?
No. The ToolsCrush Image Compressor, Image Resizer and Crop Image tool process the photo inside your browser, so the file stays on your device.
Now you know how to compress image to 50KB in a couple of minutes, with a clear face and no paid software. Save your final files in one folder so they are ready for the next form.
Need help with other uploads? Read our resize photo and signature to 20KB guide for small exam files, or the compress PDF to 100KB, 200KB or 500KB guide for documents.
Upload rules can change with every new notification. Always follow the latest instructions on the official portal for your form. ToolsCrush is not connected with any government department, exam body or visa authority.